

How To Start a Blog (Even If You Have 0 Experience)
Whether you have a unique story to share or just love writing about your favorite topics – a blog is an EXCELLENT way to share your thoughts and skills.
Not only is it fun, and you can build a community with it, but you can also generate thousands of dollars per month from it.
Throughout this guide on how to start a blog, I will walk you through everything from getting set up to monetization. We'll also look at ways to grow your audience as quickly as possible – even if you have no experience in doing so.
So, if you've been struggling to understand where to start, stick with me throughout this article – because it will simplify the entire process.
Starting a Blog: Quick Start Guide
There are a TON of ways to start a blog, but only really 1 right one. So in this quick start guide, I'm going to walk you through the essential steps.
- Sign up for the basic plan at Namecheap. As your blog grows, you'll have to go for something more advanced like Flywheel. But there's no reason to do so this early.
After you have signed up, NameCheap should give you some instructions. Follow them.
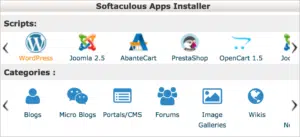
From here, you'll need to install WordPress – which you can do by heading over to the Cpanel and then looking for the Softaculous Apps Installer. Then select it, and at the top of the “Top Scripts” section, you should see WordPress like this:
From there, once you have your WordPress installed, open the dashboard.
Now, you need to install an affordable theme. I recommend the Astra or OceanWP theme because it will display your recent posts on the home page. This makes it easier for you to get started, as you won't need to learn how to build a home page. However, you can do this later on.
Plus, the two themes named above are two of the most popular themes in the WordPress community – so you know they are good.
With that being said, let's dive into the tutorial to get a more detailed look at the steps.
How To Start a Blog – Step 1: Choose & Understand Your Niche
One mistake that most beginner bloggers make is that they try to cover too many niches without a clear plan on who their target audience is… aka. Who they want to help with their content.
This then makes it harder to:
- Rank in Google because Google will not recognize you as an expert in any of the topics.
- Serve your audience and help them solve their problems because your content goes in so many different directions.
- Keep readers, as your visitors may not be interested in your future content about a different topic.
My advice in picking a niche is to go for something you are interested in and knowledgeable about. This way, you will find it easier to create genuinely engaging content and not just a mashup of what everyone has already said.
And you will have more experience so you will have a better understanding of your audience's problems.
Blog Inspiration & Ideas
To give you an idea of how big your blog can grow and how other blogs are operating – I wanted to walk you through some successful blogs.
This way, you can see how they are creating content, engaging with their audience, and monetizing their blogs – so you can get inspired by them.
Superstar SEO
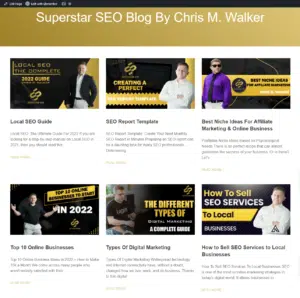
On the SuperstarSEO blog, we like to teach our readers how to get better at SEO & rank. Our target audience is small business owners, SEOs, and bloggers, who need to learn SEO to make the most out of their profession.
Our aim with the content is to teach them SEO so that they can conquer their industries.
Legiit
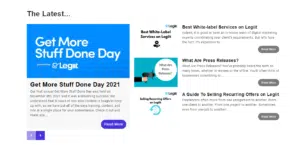
The Legiit blog focuses on two things:
- Helping freelancers make more sales
- Helping business owners grow their business and invest in the RIGHT talent
As a company that connects businesses with freelancers, this helps us (I am the CEO of the company) serve both of our ideal customers – while educating them and pushing them toward their own goals.
Ahrefs
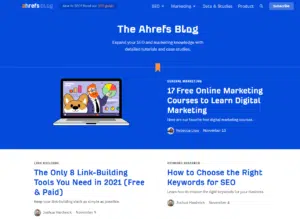
Ahrefs is one of the most popular SEO tools, and as you might guess… Their blog covers SEO.
However, I chose this one as an example because they use their tool and create tutorials with it.
So they can help visitors achieve a particular result IF they sign up for their tool… which leads to a flood of trial signups/customers.
CopyBlogger
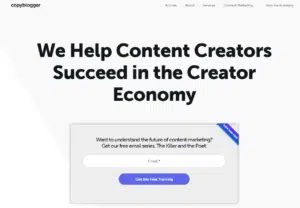
CopyBlogger is another huge blog that focuses on content marketing. According to TargetInternet, it is generating a whopping $33.1 million per year, mainly from their services and info-products such as their academy.
The goal of their blog is simple: Find Entrepreneurs and business owners who want to invest in content marketing – then give them A LOT of value upfront. Then, if they want more, they can sign up for their paid products and services.
This is an approach you can take as well to build your audience.
Are Others Interested In Your Topic?
While you don't want to go too broad on the niche, you also want to make sure that others are interested in it too.
There are two ways of going about this:
A) Checking that there are similar blogs online
B) Looking through the Google results to see that others have used similar topics.
Another approach you could take is checking that there are YouTube videos around the topic. If it's popular on YouTube, it will likely be so on Google too.
Also: Don't worry if others have covered the same topic as you – you can always add your twist through personal stories and life experiences.
Just make sure that you aren't trying to rank for super-competitive terms like “weight loss pills.” While this may be possible, it's going to be very hard if it's your first blog.
Don't Go Too Broad
One mistake that I've seen so many beginners make with their first blog is choosing broad topics:
- “Make money online.”
- “Health”
- etc.
While there sure are people interested in this topic – you'll also be competing with an INSANE amount of competition. And, because these topics are so broad, it's usually tough to get past all of this competition – so only the top dogs do it.
Here are some examples of niching down that will multiply your chances of success:
- Instead of “make money online,” you could focus on “Dropshipping with WooCommerce.” – then cover specific WooCommerce plugins, tutorials, etc.
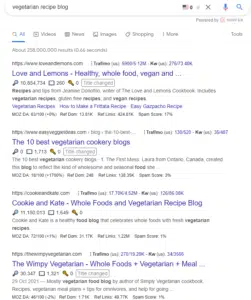
- Instead of “Health,” you could create a blog about “Living as a Vegetarian.” – then cover getting enough Protein, vegetarian meals, etc.
Of course, these are just examples, but they will help you serve your target audience better AND show Google that you're an expert.
Start a Blog – Step 2: Choose a Name

This is a part that many people struggle with. But don't rush it because it's something that you're likely going to have to stick to for some time.
There are ways of changing your domain and blog name later. However, you may lose branding value and readers if they don't notice you changed your name.
Some general guidelines:
- Try to avoid unnecessary numbers (ex: WeightLossForBeginners353595)
- Try to avoid hyphens in your name (ex: Weight-loss-blog-for-you.com)
- Try to keep it short and snappy (under 15 Characters)
A Name That Reflects Your Idea
One approach that I like is coming up with a name that instantly gives your readers an idea of what you teach people.
The cool thing about this is that if your target audience is trying to achieve a particular result, they will instantly recognize your brand as something they may want to follow.
I did a quick search for some examples to give you an idea of what I'm talking about.
Examples:
MorePlatesMoreDates.com (A weight lifting website where the name is a catchy rhyme and talks the process + plus a potential result)
textinggod.com (A dating advice website that teaches guys how to text and land dates)
ragstoniches.com (A “make money online” site where “niches” is a common term… and can perfectly replace the “riches” in “rags-to-riches”).
A Catchy Brand name
Another excellent type of name is a catchy, short, and snappy brand name.
It doesn't necessarily have to be a meaning, but something that helps your readers remember you.
Here are some examples:
- Zapier
- Legiit
- Mashable
Checking Whether The Domain Is Available
For this, you need to head over to NameCheap, the cheapest place on the internet to buy domain names. They also come with free Privacy protection, which stops people from finding your personal information through your domain name.
Remember: If your domain name isn't available, don't try to add random numbers or hyphens. This will just give you a HUGE disadvantage when competing with someone who has the real name.
You'll need to be a little creative with this, but again don't rush it. If you need it, take a couple of days for this decision.
Start a Blog – Step 3: Get Hosting With NameCheap
As you may have seen in the quick start guide – we also need web hosting.
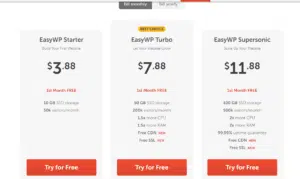
Again, I recommend NameCheap if you are a beginner because it's affordable and straightforward to sign up with. Plus, if you sign up for their WordPress hosting here, it comes with your first month free – so you get to test it out first.
While you can go on any NameCheap plan you wish, I recommend going on one of their WordPress hosting plans – because it's optimized for the CMS we're going to be using.
It's also going to be enough until you hit 50K/visitors per month, so you'll be able to stay on NameCheap for quite a while. And that's on the lowest WordPress hosting plan that NameCheap offers.
Like all the other hosting providers, after you sign up, NameCheap will try to tempt you with many add-ons. But you don't need any of these.
One of them usually is Domain Privacy Protection, but as already discussed, that is free with NameCheap. In terms of SEO, I will walk you through some of my preferred resources later.
Start a Blog – Step 4: Install WordPress
WordPress is the #1 blogging platform and the most popular CMS: 37% of ALL websites are hosted on WordPress. It's designed for blogging, as you can add any functions to your website as your blog grows.
You don't want to choose a platform that limits your growth, so I suggest you go with the WordPress CMS.
Here are the steps to install WordPress:
- Head over to your CPanel
- Open the Softaculous Apps Installer
- Head over to “Top Scripts” and select WordPress
- Start the Installation
If you did choose another hosting service to NameCheap, this process should be pretty similar. But if you do get stuck, you can do a quick Google search for “how to install WordPress on (your hosting).”
Once WordPress is installed, you can click on “edit website,” and you will see your WordPress dashboard.
Start a Blog – Step 5: Designing Your Website
Next, we need you to take a 3-month web design course to design your blog's website…
Nope, I'm kidding.
But I will need you to find an easy-to-customize theme that looks good. Ideally, you will want to use one that just shows your latest blog posts on the home page because then you don't need to design anything.
My suggestion is the Astra theme or OceanWP.

But you can also use any of these popular themes:
- Divi
- Ultra
- Spencer
- Hellomouse
If you head over to appearance > then customize in your WordPress dashboard, you'll be able to customize your theme. There's REALLY a lot that you can do here, but I recommend just taking a quick look through the settings and then configuring the basics such as:
- Site Name
- Tagline
- Site Icon
Once you have done this, you can go to your WordPress settings and ensure your blog page is set to your home page. Again, this is a temporary solution that displays all of your blog posts on the home page.
But it's also the most straightforward way to get your blog ready to go, which is why we're using it for this tutorial.
Branding Components
For your branding components, such as your logo or social media headers – you have two options:
- Hire an affordable graphic designer on Legiit
- Use Canva templates to create your own
You also want to stick to some core colors that you want to use to represent your blog. This can be two colors, but no more than three. Then make sure you use them in your logo, on your website, header, and everywhere else.
Start a Blog – Step 6: Basic SEO
SEO which stands for search engine optimization, is a pretty essential part of blogging. Why?
Because it's going to be one of the primary sources of traffic for you.
Let me give you an example:
Suppose you have a fishing blog and write about Saltwater fishing tips… Of course, you would want that to show up in Google when someone searches for “Saltwater fishing tips.” And SEO is precisely how you do that.
Okay, so how does SEO work?
There are four main components:
- Keyword Research: Finding the words you want to rank for
- Content & On-page SEO: Creating content that the users are looking for and optimizing for it.
- Off-page SEO: Getting people to share your posts on their blog & social media
- Technical SEO: Making sure your website is technically sound
Now there is a LOT more to SEO. But I just wanted to walk you through some of the basics first to understand the core components.
On-Page SEO
For On-Page SEO, I recommend downloading the Yoast SEO plugin.
This is like a checklist to ensure that you have used all of your keywords in the right place.
It also offers a free version, so you don't need to invest in the paid one at this moment – making it perfect for a beginner.
You can download this plugin by going to plugins and then “add new “… From there, search for “Yoast SEO.”
Once you have downloaded it, you can go to the general Yoast SEO settings by clicking on the icon at the top of your dashboard.
From there, you can configure your website name, connect to Google search console and save the changes. If you're unsure how to connect to Google search console, sign in to your Google account, and then it will ask you to verify your ownership through one of the following methods:
- HTML tag
- Domain Name Provider
- Google Analytics
- Google Tag Manager
While you can select any, I recommend going with the HTML tag – as this should be the easiest. From there, Google will give you a piece of code that you can copy and paste into the Yoast SEO settings, after which you need to save the settings, and then you will be done.
Next, you'll need to open the installation wizard, and Yoast will walk you through the setup.
Most of this is self-explanatory, as it's things like “website name,” “type of website (i.e., blog), etc.
Once you have done this, you have optimized the core settings of your blog – but there are still a few more things you need to do.
XML Sitemaps
One thing that you still need to do is configure your XML sitemaps. This is a directory of all the links on your website that Google keeps, which helps them crawl (i.e., find everything on your website).
Usually, this can be confusing to set up, but luckily Yoast has a setting that will enable you to configure this easily.
In your Yoast settings, head over to “Featured” and ensure the boxes are enabled. I also like to have the rest of the settings on this page enabled.
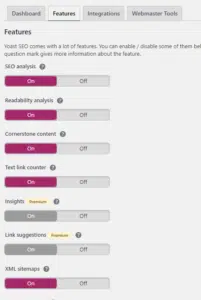
From here, go to the XML sitemaps, which you will see on your left sidebar, and select the user sitemap tab where you can toggle “Author/User sitemap” so that it's enabled. Then save your changes.
Feel free to play around with this to your preference. However, what we have set up so far will get you on the right track.
Permalinks
Next, we need to optimize the core link structure of your blog. What we want to avoid is having long, confusing links because that is bad for SEO. Plus, it just looks ugly when people are visiting your blog and makes pages harder to find.
In your WordPress dashboard, follow these steps:
- Hover over settings
- Go to Permalinks
- Select “Post name.”
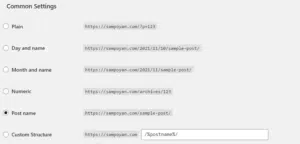
This way, the post structure looks clean, and it will be easy to find. Make sure to save the settings here.
Categories
Another thing that you'll want to do is head over to your posts in the WordPress dashboard. From there, you can click on “categories,” then “add new,” and add categories. Again, this should be sup-topics of your niche.
So, for example, if you would be writing about SEO, some categories could be:
- On-Page SEO
- Off-Page SEO
- Technical SEO
- Keyword Research
And whenever you write posts, you can fit them into the most relevant category. This helps you keep an overview, and it also helps your readers find the posts that they are the most interested in.
Start a Blog – Step 7: Find Blog Topics
As discussed earlier, you should have a basic understanding of what you want to blog about already. Now it's time to find more specific topics and plan them.
You might come up with questions that you can Google like:
- What should I blog about?
But you can reverse engineer this process and develop questions that people might ask about your topic.
Here's an example: If your topic is dating for men – someone might ask “how to get a girlfriend.”
This is a real example (and probably also a very competitive keyword). However, it should give you an idea of how you can generate blog topics. If it doesn't, don't worry; I will walk you through many other ways as well.
1. What Worries My Readers?
One of the biggest reasons people read content is to solve their problems. What problems does your audience have?
And what do you know that can help them solve them?
Topics driven by problems is one of the best ways to get loyal readers because if you're helping them improve their life – they will keep coming back. Plus, if you're writing about a field you're experienced in, you can think about some of the problems you used to struggle with.
For example, when I started SEO, I didn't know much about what links were correct or optimized a page was. And there was so much different information out there that I was just a little confused.
So I try to build that into the content I create.
2. What Excites My Readers?
Another emotion that could get your readers hooked on your content is excitement. So what are the topics that excite your readers? For example, if you would be in the weight loss space, it may be delicious low-calorie meals that mean they don't have to cut their favorite meals.
There's endless excitement in most niches – so try to think of some topics that will get your readers pumped up and enjoying your content.
3. What Do My Readers Love About My Niche?
While pain is an excellent motivator and writing about helping your audience solve their problems is excellent… There sure should be things they love about your niche too. For example, if you're in marketing, more sales maybe with little effort and cool tricks.
Think about some of the happiest moments someone in your niche can experience and think about topics around them.
Tools To Give You Ideas
The cool thing about the internet is that you have an ABUNDANCE of ideas at your fingertips. So, if you are not in your creative mode right now, you can check out some of these tools below to give you some ideas.
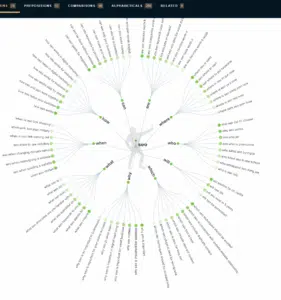
AnswerThePublic: AnswerThePublic will give you a massive number of questions about your niche in seconds. And you can note down some of these ideas, then cover them on your blog. Just head over to their website and enter a word related to your niche to get started.
Reddit: Reddit is an excellent place to get content ideas – because it's where you find the questions that the average joe would ask. Browse some subreddits in your niche, and look for some of the questions that users are asking. You may also find other types of content ideas by looking at some of the most upvoted posts.
Social Media: Social Media, similar to Reddit, is another excellent place to get content ideas because it's where your target audience is sharing their thoughts. Just browse through some Twitter discussions, some Instagram comments, or Facebook groups, and you should be able to spark some content ideas.
Step 8: Write Your First Blog Post
Now that we have gone through the annoying settings of starting a blog, it's time to finally write your first blog posts.
From the home of your WordPress dashboard, you should see posts on the left sidebar, as shown in the image below. Here, you can see all the posts you have ever written.
By default, there will only be one called Hello Dolly – just click on it, and you'll be able to edit it. If you don't have it, you can also click “Add new” at the top of your screen.
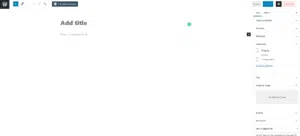
This ladies and gentlemen, is the WordPress editor…
On the left-hand side, you'll see a “+” sign. If you click on that sign, you'll see a selection of blocks that you can add to your article.
Some examples of them are:
- Lists
- Quotes
- Headings
- Images
I think you get the point that most of what you will be adding – will be done through this little plus sign.
However, some of these blocks will have individual settings, too; to open them, just click on the block (after you added it into your content).
From here, go ahead and add one of the topics you researched earlier into your title. Once you have done that, WordPress will automatically create a permalink for your title. However, what you'll want to do is shorten this while keeping all the main terms in.
So, for example, in this post, we went for “how-start-a-blog” instead of “how-to-start-a-blog-ultimate-guide”… It makes it much cleaner and better for SEO purposes.
Writing Your Blog Post
Writing your blog post is easy.
After you've added the title, you can start to unleash your creativity & type in the body of the content.
Here are some of my favorite tips to write killer blog posts:
- Deliver what the title promises
- Don't fill the article with fluff that the user already knows
- Back up your points with statistics
- Involve personal stories to make sure your article is different from everyone else's
- Fill the paper with exciting visuals that complement the content (we'll talk more about this below)
- Speak in a conversational tone
You can add images via the block button that we discussed earlier. From there, you can upload the images from your PC or insert them from a URL. Make sure only to use images you have the right to, or you might get into some serious trouble.
Here are some of my favorite places to get images:
- Unsplash
- Pixabay
- Pexels
- Canva
Of course, if you are blogging about something that you can take pictures of, you can use them too. WordPress also gives you some tools at the top of the page that you can use to resize, crop, or add links.
Make sure to fill out the alt text with something relevant to the post and the image.
Formatting
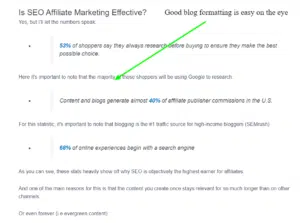
Something that I also wanted to touch on briefly is formatting. Some bloggers try to use the same rules that are applied in school on their blogs.
This doesn't work well because on your blog, it's more about keeping attention.
And the quickest way to lose attention is long paragraphs that make everything hard to read.
So, make sure to follow these formatting tips to help make it easier for your visitors to read your content:
- Use white spaces every 1 or 2 sentences
- Use proper headings (H1, H2, etc.) to break up your sections
- Use as many bullet points as possible
- Use the images to break up your text as well
Finalizing SEO Settings
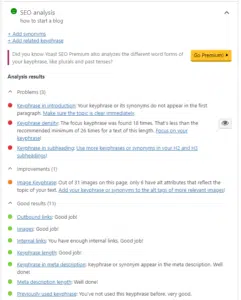
On the side of your WordPress editor, you should see a field for Yoast SEO. Here, you can see how optimized your page is overall.
First, ensure that your keyword (i.e., what people will be typing into Google) is configured in the keyword section, as shown below. From here, you will see a green, orange, red traffic light system that will tell you what you need to do.
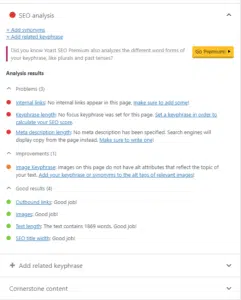
Also, at first, it will be hard to add internal links because you don't have a lot of posts. However, as you grow the content on your blog, this will be easier. Plus, you can always come back and add some to the old posts when you were starting.
> Why are internal links important?
Firstly they help the user navigate through posts, and secondly, they also channel the authority throughout all the posts in your blog.
NOTE: This doesn't have to be perfect – aiming for 80% green is an excellent start. Some of these points, like keyword density, aren't that important on some keywords, so it is also a general guideline.
But most of them will help your SEO if you make them green.
What Does The End Result Look Like?
After you have gone through the steps above, you should have your blog post ready. Then, you can preview it by hitting the “preview” button on the top-left hand of your screen.
Here you can check if there are any formatting improvements and that all the images are shown correctly. Finally, if you are happy with the blog post, go back to the editor and hit “Publish.”
Congratulations! You published your first blog post.

And therefore – you have officially started your blog.
Now, keep in mind that to grow your blog – you will have to:
- Stay consistent
- Learn how to drive traffic to your blog
- Learn how to monetize your blog
And that's what we're going to look at throughout the rest of the article to get you on the right track.
Step 9: Editorial Calendar
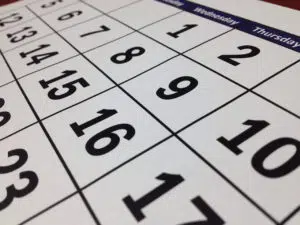
Let's start with the “staying consistent” part. The worst thing you could do as a blogger is a post “whenever you feel like it” because this will ultimately lead you to post once per month. This simply isn't enough if you want to grow your blog.
The best way to stay consistent is to stick to an editorial calendar, also known as a publishing schedule.
This way, you'll have set times in your week that are for your blog – and you'll know when you have to tell the friends that you can't meet them at your favorite restaurant.
For example, you could publish a blog post-Mondays and Wednesdays after work – plus another on Sundays. And no matter what happens, you post on those days.
Planning Your Editorial Calendar: Don't Make This Mistake.
The next step is to plan your editorial calendar. One mistake that many make is that they don't.
If you do this, you'll be sitting there for 30+ minutes looking for a blog topic EVERY time you need to publish. And you'll waste a lot of time.
Instead: Once per month, come up with topics for your blog – as we did earlier. From there, you can plan them in your calendar and always know exactly what you need to do.
Try To Plan Topics As Related As Possible
As I mentioned earlier, you want to prove to Google that you're an expert on a topic.
So when planning your blog posts, make sure that they relate to each other. For example, if you're talking about a sub-topic, try to cover it and most of its angles (between several blog posts) – before moving on to the next one.
This will build your topical authority, and Google will recognize that users are more likely to find what they're looking for on your website.
Decide Your Publishing Frequency
Before you start creating your calendar, you need to figure out how often you want to post. Unfortunately, some bloggers set themselves unrealistic goals like publishing every day, then get burned out… And give up.
To avoid this, I recommend going for something like 3x per week, which is a schedule that you can stick to while seeing consistent organic growth.
You may even want to go with even less, but keep in mind that your growth will likely be limited if you don't post a lot.
I wouldn't go with anything under 2x per week though if you want to see your blog grow and monetize it in the future.
Note: If you have a lot of other responsibilities, you can also consider outsourcing some of your content writing. I do the same for my businesses and use Legiit – where there is a HUGE ocean of talented content writers that specialize in SEO writing.
Additionally, you can also provide these writers with briefs to make sure that they cover the right points in your articles.
Create Your Calendar
Now it's time to create your editorial calendar template.
First, open up a new Excel or Google Sheets spreadsheet.
We're going to keep it simple and start with just four columns – Publishing date, title, keyword and the link. If you have several writers and want to plan those in, you can also add another column for it.
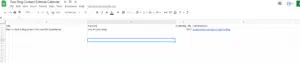
Of course, depending on how you plan on keeping your schedule, you may need to add more fields to this. For example, if you have several people looking at this calendar, you may need to add a field for notes.
From here, start planning your blog post ideas with the schedule that you decided on earlier.
What Is The Keyword Column For?
The keyword column is for SEO purposes, and it's basically what people are going to type into Google to find it. I'll walk you through some tips on finding the best keywords later on, but this will basically help your chances of ranking in Google.
Usually, the keyword is the main part of the article's title.
Set Reminders If Needed
Another tool you can use to help yourself stay consistent is your alarms on your phone and PC. You can set the alarms for the days and times where you are meant to write, and that way you won't forget.
It's simple, but it can definitely remind you when you're too invested in your favorite Netflix show.
Step 10: Let's Talk Business & Monetization
So, far we've talked through everything you need to know about publishing – and you should be ready to start. But wouldn't it be AWESOME, if you could earn money from your blogging efforts?
Well, you can. In fact, top bloggers are earning MILLIONs per year.
So, I wanted to walk you through some of the ways you could monetize your blog, once you have the traffic… And don't worry I will be giving you some tips on driving traffic as well.
Affiliate Marketing
Affiliate marketing is one of the most popular ways to monetize a blog. How does it work?
You write about products on your blog, then link out to them. Whenever someone clicks on a link, you earn a commission of the sale price.
The reason, it's so popular with bloggers is that you don't need your own product – and you're free to promote almost anything you want as more than 80% of companies have affiliate programs.
This means you can promote products that you love and recommend – while earning a commission… Pretty cool huh?
To find affiliate programs in your niche, just look at what others are promoting. Or do a quick Google search for “(niche) affiliate programs”.
Alternatively, you can also check out some of the most popular affiliate networks such as:
- ShareASale
- FlexJobs
- ImpactRadius
- CommissionJunction
- ClickBank
Want to learn more about Affiliate Marketing with SEO? Make sure to read Affiliate Marketing SEO For Dummies
Ads
Another popular way of monetizing a blog is through advertising. This involves displaying banners on your website through an advertising network such as Google ads or Ezoic. Compared to other methods such as affiliate marketing or selling your own products, it's not as profitable – in terms of earnings per click (EPC).
However, that doesn't mean it's a bad approach – because sometimes ads are the best way to monetize your blog. What I will say is that you will need a lot more traffic to make ads worthwhile.
Some of the main advertising networks include:
- Google ads
- Ezoic
- Outbrain
Selling Your Own Products & Services
Here's one of my favorite ways to monetize your blog: Selling your own products. Why is it my favorite?
Because it gives you the most control over what you're selling – and you can be sure that the products are of good quality. For example, I monetize this blog by selling my own services, and my Superstar SEO academy course.

Here are some examples of how you could sell your own products or services:
- If you are a fitness coach, you could sell consultations and courses
- If you are a graphic designer you can sell your graphic design services on the same website
- If you own a SaaS tool or are a developer, you can sell the tools on the same website
Another way you can generate more clicks to your own products and services is by hiring someone to create a banner ad for you. From there, you can then display that banner across your blog, and sell more of whatever it is that you're selling.
Sponsorships
Finally, we have sponsorships. Once you grow your traffic, you will have companies contacting you, and asking whether you want to promote their products for a price. Usually, this involves, you writing a blog post specifically about their product, and them paying you to do so.
But, usually, these companies will reach out to you – and then you can make a deal with them.
If this is one of the main ways you want to monetize your blog, you can also put a section on your contact or about us page giving brands more information.
Step 11: Traffic
So far, we have covered everything from publishing to monetization. But, I also wanted to walk you through some of the ways you can drive traffic to your blog – as this will help you grow.
“It's not the best content that wins. It's the best–promoted content that wins.” ~ Andy Crestodina
The three most popular traffic methods with bloggers are:
- SEO
- Social Media
- Email Marketing
And you should be using ALL of these to grow your blog – so I wanted to walk you through them individually.
Social Media Accounts

Now that you have your blog set up, I would definitely recommend getting your social media accounts set up. The reason I say this is because they are beneficial in several ways:
- You can get more shares on your content
- You can drive your existing followers to your new blog posts
- You can build valuable connections that lead to collaborations or influencers sharing your content
Below, I've walked you through the main social media platforms I recommend for you as a blogger.

Pinterest is one of those social media platforms that a lot of people forget about – including myself to a certain extent.
However, research shows that it has the highest CTR on links, which makes it a valuable tool for bloggers. I'd recommend getting an account up, adding a profile picture & a cover – then follow this quick start guide to get started:
- Optimize your bio with niche-specific hashtags
- Create a board for every category on your blog
- Sign up for a free Canva account
- Every time you make a post, create a pin for it and add it to the relevant category
- Use relevant hashtags on all your pins and category descriptions
- Follow other accounts in your niche and add their pins to your boards 10x per day

Twitter is also a good platform for bloggers because it's arguably the easiest platform to get shares (i.e retweets on).
Again, create your account and make sure to add a profile picture and a header. From there fill out your bio that gives visitors an idea about what your content is about, or what kind of RESULT it can help them achieve.
And here's my quick guide on growing your Twitter account.
- Tweet 2-3x per day (You can also use points from your blog posts, and turn them into little tweets)
- Follow big accounts in your niche and engage with their tweets (comment & quote)
- Share your latest posts
Facebook/Instagram/LinkedIn/Clubhouse/Snapchat
Whether these other platforms are heavily dependant on your niche. For example, if your target audience is very young I personally wouldn't use Facebook, or Snapchat if they are older.
The point is it depends. But given that you are interested in your niche, I would assume that you have a rough idea of what platforms your target audience is using.
Again, make sure to do the following for the platforms you choose to use:
- Optimize your profile to catch attention
- Add a nice profile picture and header
- Engage in relevant communities
Facebook Groups
Facebook groups are also really effective for growing your community. This is because you have a group where your audience can engage with you, and other members of your community. I also have one under the SuperstarSEO brand, which has over 74,000 members.
For this, just promote your Facebook group via your blog and email list. From there, it can be an additional channel that you promote your content too, and share your sales material.
SEO:
We spoke a little about SEO earlier, but I wanted to walk you through some more specifics. In particular, keyword research.
Now you should already have a basic idea of how SEO works: You optimize for the keywords, and if Google likes your content they will show it whenever users type in those keywords.
So, how do you find keywords? Let's take a look.
Keyword Research
While there are paid tools such as Ahrefs, I'm going to walk you through a free method in this guide.
- Download the free chrome extensions Keywords everywhere and SurferSEO
- Head over to Google and start typing in the topics you found earlier
- On the right-hand side, you will see keyword suggestions
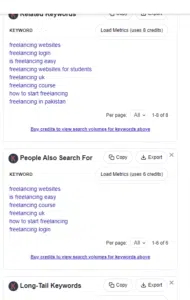
4. At the top, you will see the search volume

Also, when you want to start learning about advanced SEO techniques like link-building, make sure to check out some of the other posts on this blog.
Email Marketing
Email marketing is an excellent way to keep your readers. Why?
Because it's easy to collect email addresses and then you can promote your future blog posts. And more traffic = more revenue.
For this, I recommend starting with a free service like Aweber which will allow you to build landing pages that you can embed on your blog. From there, you can create newsletter emails using their templates and promote your future blog posts.
How To Start a Blog: Frequently Asked Questions
I also wanted to answer some frequently asked questions about starting a blog.
How do bloggers get paid?
Bloggers get paid through a variety of ways such as:
- Sponsored posts
- Affiliate Marketing
- Banner Ads
- Selling their own products/services
How do I start a blog for free?
You can start a blog for free using WordPress.com, blogger or Weebly.
However, I do NOT recommend it if you ever want your blog to generate revenue. The reason for this is because you will find it hard to migrate your blog to a better service like WordPress.org, and free options simply don't have the right growth tools.
What are some options for CMS to use on a blog?
The best option is WordPress. However, Squarespace is okay too, and Shopify is one of the best options if you run an eCommerce store.
Is it worth starting a blog in 2021?
Yes, starting a blog is still worth it in 2021. Nothing has changed, as Google is still the most used search engine, which means it's a huge traffic source that you can tap into.
What should I blog about in 2021?
While there are endless blogging ideas, I recommend sticking to something you are knowledgeable about. If you love traveling, blog about it. If you're a fitness coach for a specific target customer, blog about it.
It really depends on what you spend your time on. However, going into a niche that you don't understand makes everything even harder.
How do I optimize my blog for search engines (SEO)?
Here are the steps to optimize your blog for search engines:
- Download Yoast SEO
- Set a clean Permalink structure (domain.com/post)
- Submit your XML sitemaps
- Learn On-Page SEO components
- Optimize your blog posts with on-page SEO
- Learn link-building for beginners
How To Start a Blog: Final Thoughts
Woah, that was a monster of a guide. I hope you have enjoyed it and have found everything you need to get yourself started on your blogging journey. Just remember, that you always need to stick to your publishing schedule, as consistency is so important.
Plus, don't stop learning about SEO and traffic because that's how you will grow your blog.
To recap, here are all the steps
- Choose & Understand Your Niche
- Choose a Domain Name
- Get Web Hosting With Namecheap
- Install WordPress
- Design Your Website
- Basic SEO
- Find Blog Topics
- Write Your First Blog Post
- Editorial Calendar
- Business & Monetization
- Traffic
Also, if you want to actively learn about SEO, you can join our FREE Facebook group, Superstar SEO.
We have over 74,000 SEOs, business owners, and marketers in there, and it's a community that you have access to – for free.
So, whether you have a question, or would like to consume some of the best SEO content on the internet, I would definitely recommend joining it.
You May Also Like: How To Write an Email For Affiliate Marketing